HOW TO COLOUR EYES EASY MODE beginner friendly
👁 2 مشاهدات

النص الكامل للفيديو
we can add in some greens here just for fun look at that okay you stay right there very good perfect you got to stop sneaking up on me like that you know what while you're still there let me show you guys my setup yeah look at that burp burp child burp monkey look at that stance my goodness that why anyways hope you guys enjoy that but believe it or not guys that's not what we're here for today we are here to learn get ready to open up your mind with me today like how you open up your fridge at 3:00 a.m. scrounging for food for scraps like rat you guys ever just draw character and it turns out to be the most beautiful character that you've ever drawn but as soon as you go to color their eyes they end up just looking dead they look like they were the first wave landing on Normandy Beach and had to eat other humans to survive anyways my point is the eyes are the window to the soul and if you can't get the rendering right for your characters eyes the whole thing falls apart look into my eyes okay look at the lack of light there's no joy here there's no happiness no sanity boom check it out here's some diagrams I'm here today to help you guys out walk you through this dumb it down explain it to you like I'm stupid this is going to be easy mode all right so the first thing that you want to remember when you're drawing an eye when you're rendering an eye is that the eye is ball okay it's threedimensional it's going to roll around in your eye socket it's called an eyeball the two really key things to pay attention to when you're rendering the eye are the iris and the cornea here's great way to remember this okay this is the eyeball the ring in the center of this eyeball that is called the iris that is what gives your eyes color that is what makes your eyes blue green brown black and then in the center of that there's hole there's black hole into your soul where light enters never to be seen again and like to think of this Iris shape as an indented shallow bowl you can in fact put some noodles inside okay just remember that now why are these things so important when it comes to rendering the eye well remember the things that we talked about the cornea and the iris when you find your light source that's hitting the eye there's going to be couple different things happening here number one the Rays of light are going to go through this clear cornea and reach parts of your iris and number two because the cornea is smooth and chronically wet like your that means when the Light reaches it you're going to have highlight on the surface that's what gives our eyes that shiny look okay so it's happening on two different surfaces the cornea sits out bit and the iris is actually behind that so the color of your eye sits behind the Highlight on your eye very simple so far right if you think of the iris now as slightly shallow bowl shape that means if the light is coming from here let's say up top the bottom side of this iris is going to be more lit than the top side and it also means if the light is coming from this direction that the Highlight will be on the top side of the cornea so what this is going to look like in front is that the iris is going to be here it's going to be round you're going to find the Highlight on the top side and you're going to find that the top side of this iris is also going to be the darker side now let me just show you guys this Lighting in action okay let's say we're drawing brown eye and let's say the lighting is coming from up top so remembering the bowl method we're going to take this brown color we're going to select slightly brighter color and we're just going to apply it to the bottom half of this Iris make it lighter as you get to the very bottom and Let It Fade Out To The Top see just like that and now we have some thre dimensionality to our eye now let's select an even darker color for the black hole that is the pupil now because we're lazy we're going to reuse this dark color that you put down for the pupil and I'm going to apply some of that just under the eyelid and allow it to fade into the light color at the bottom now you're probably asking why the dark color just under the eyelid well think about it Pretend This is the surface of your iris okay if you have something coming on top pause if you have something covering the top side of it you're going to get some ambient occlusion just underneath where the light wouldn't touch just underneath the eyelid you're not going to get as much light so it's okay to make that part dark okay so this this is how teach guys you have to always understand why you can't just do something without knowing why all the tutorials out there who tell you to do this this in this without telling you why they're doing you huge disservice see now this already looks fantastic now the the last thing that we need to finish this off is to select bright color for the Highlight could be light yellow could be light blue whatever color works for that scenario get brush with hard Edge this is case where you definitely don't want soft edges and just apply that highlight in the direction where the light is coming from so if the light is coming from top down that means the Highlight is going to be in the upper portion of the eye it's very simple and if there's something like reflected light coming from the bottom then you're going to get highlight maybe on the bottom side and there's quick and simple render for the eye but don't want you you guys that just take my word for it okay check out some of these real life examples what do we got here we got nice soft top down lighting like so and look at the iris here okay you're getting brighter bottom half Fading Into Darkness up at the top and highlight towards the top half the iris so in practice it's going to look something like this step one we're going to get base color in here for the whites of the eye step two find your base color for the iris step three determine where the light source is and start adding that light disc so the light disc is going to be on the bottom half of this Iris just like that step four create that black hole that is the pupil and use some of that color to darken the top of this Iris some people have this dark rim on the outside of their irises which you also definitely want to pay attention to and last but not least this is the finishing touch you want to add in the highlights on the opposite side of the light rim of the irus if you want to add little bit more you certainly could you can add in some of these highlights that's occurring because of the bounce light hitting the ey or you can just leave it as this you can even get in here and start varying up some of the colors now you can add some Reds add some green maybe little bit more saturated Browns just like that and there you go there's beautifully colored eye in few very simple steps here's another great example and you can follow along with me if you want okay step one grab the whites of the eyes usually for the whites you're going to see little bit of shading on it because it is round it is spherical remember the eye is ball boom just like that okay now you're going to grab the color for the Iris now we're going to select lighter color and figure out where the light source is coming from in this case it's also coming from top down so that means we are going to put this light color towards the bottom side of this Iris just like so okay and the intensity of the color of the iris is going to change depending on the color of the person's eye now we're going to select dark color and apply that to the dark pupil using that same color we're going to apply some of this dark shading towards the top of the eye so little bit here just under the eyelid and Let It Fade Out into the light okay Let It Fade softly but now you guys see there's some good Lighting on this irus now we're going to add in this dark Rim some people have it some people don't if you don't have it it's okay it's not the end of the world but it does look nice now last but not least let's get some highlights on here all right just following what you see in the reference just like so boom and there's little hint of blue in this highlight okay so I'm going to add that in there what beautiful eye in such simple steps right and you know once you figured this out you can really start adding some more details you know if you really want to add in the texture of the iris you could and you can really start kind of stylizing it if you want you know you can make parts of it even lighter parts of it even darker we can add in some greens here just for fun look at that you guys see how easy it is when you figure out why and you manage to break it down into simple steps and there's blue one and remember you could do this with any eye type with any eye color it's very very simple here's green eye for example okay we're going to add some Shadow up top and then at the bottom we're going to add some really bright highlights just like so and you can even mix up your colors you know start adding some tealish colors into this eye or you know really accentuate that dark rim and for the final finishing touch you can add in some highlights always remember the direction of the light indicates where the Highlight should be so light comes from up top in this direction highlight will be here and the lighter section of the Iris will be at the bottom okay it's the opposite and now you know maybe we could flesh this out bit you know give it some shape give it some eyelashes and personally you know find drawing eyes just very therapeutic it's like drawing little Jewel it's like gem the iris itself and the way the human eye is constructed is just beautiful so beautiful just going to add in some of these little streaks of texture here on the iris and look at that beautiful there there's your eye guys very simple few simple steps now repeat after me okay want you guys to commit this method to memory number one get the white of the eye number two find the color of the iris number three find where the light is coming from and as result find the light side of the iris number four add the dark color into the pupil and use that color to darken parts of the iris that's not being committed into light and last but not least number five add in that highlight and really make that cornea pop it's that easy five simple steps as long as you understand why you're doing what you're doing you could do all of this without reference and hopefully after watching this video your guys' characters are going to look so much more alive anyways guys hope this video has helped you guys out if you guys want to see more indepth longer we're talking like 45 minute long tutorial videos those are over on my patreon my patrons are the ones who make all of this possible so huge thank you to the thousands of you guys that have joined the community truly appreciate all of you guys' support and it's truly my honor to be able to help you guys out on your little art Journeys Jesus Christ that's it for today guys thank you for watching this video give it like if it's actually helped you guys out and let me know in the comments how much you hate me you know another thing that comes to mind when think about my patreon videos is that I'm actually nowhere near as insane in those videos as am in these YouTube videos mean the people in my patreon I'm sure you guys can confirm that but maybe that should be another motto of my patreon you you know join if you want to see Sam being sane Sam does sanity
 10:01
10:01
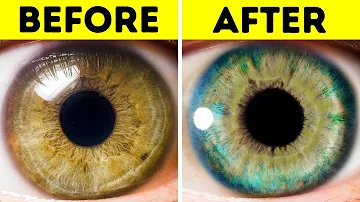
7 Things That Can Change Your Eye Color
BRIGHT SIDE
14.6M مشاهدة · 7 years ago
 14:17
14:17
The Unfair Advantages Of Your Eye Color
AlmondTheArtist
3.1M مشاهدة · 1 month ago
 9:51
9:51
How to change your eye color PERMANENTLY But is it safe Ophthalmologist MichaelRChuaMD
Michael Chua, MD
1.1M مشاهدة · 2 years ago
 28:08
28:08
How to Draw Eyes Tips and Practice
조맹 Chommang_Drawing
6.7K مشاهدة · 14 hours ago
صفحات ذات صلة

HOW TO DRAW A PERSON Beginner Friendly Step by Step

Digital Art ESSENTIALS For Beginners tutorial

كيفية تلوين أعمالك الفنية مناسب للمبتدئين

الصف 9 جغرافيا الوحدة 2 الدرس 10 الموارد المائية في الوطن العربي في سوريا ص 63 68

Lesson 10 Geography 9 th Grade Water Resources in the Arab World New Syrian Curriculum 2026

موارد سورية المائية الدرس 11 الجغرافيا الصف التاسع الإعدادي المنهاج السوري الجديد

Economic Geography Exam Solutions 2023

حل الوحدة الاولى دولة الامارات العربية المتحدة البدايات اجتماعيات الصف الحادي عشر